Table of Contents
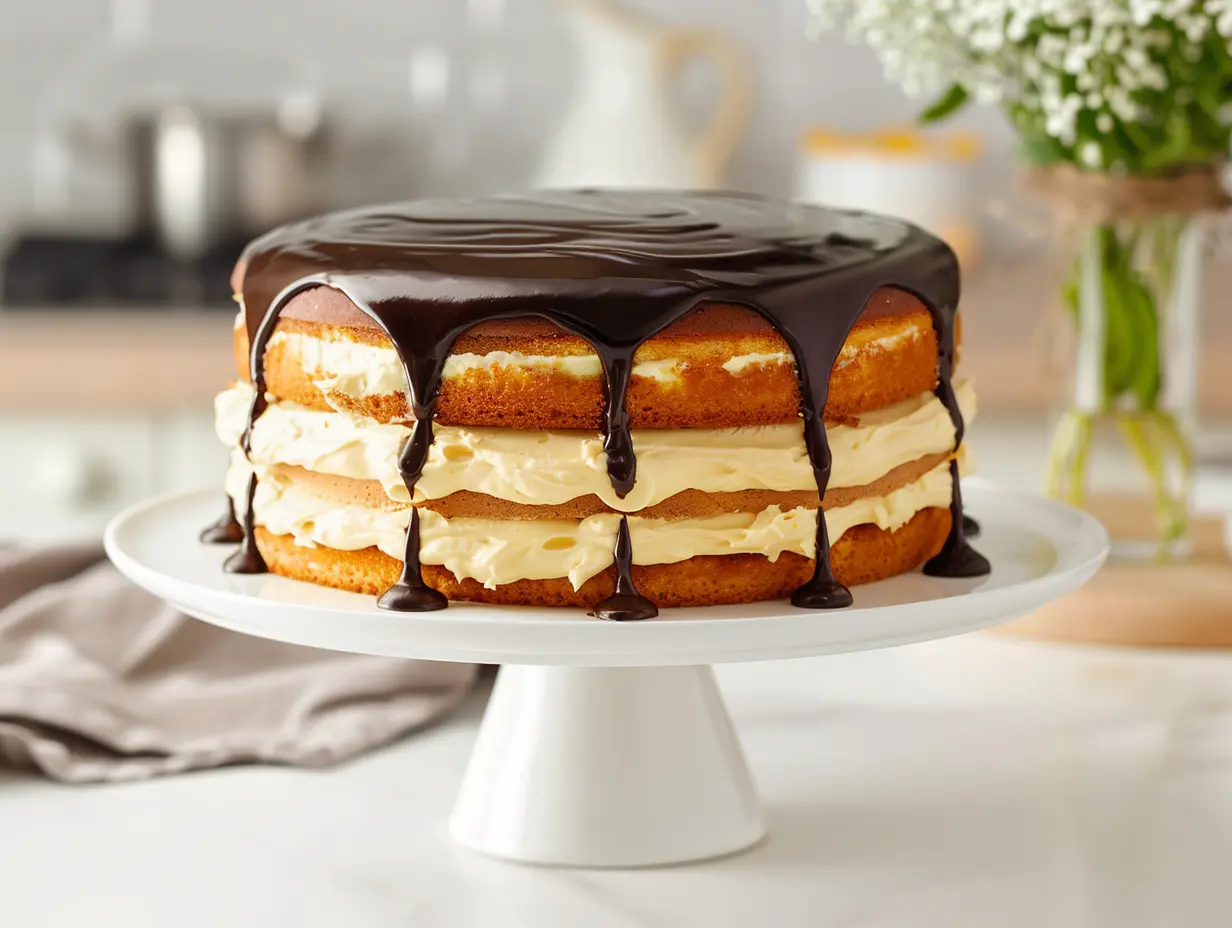
Get ready for a delightful treat with this classic Boston Cream Cake recipe! Imagine layers of tender vanilla cake, cool vanilla pastry cream, and rich chocolate ganache – a truly captivating combination. Fun fact: despite its name, it’s actually a cake, a historical quirk from Boston’s Parker House Hotel where it originated! This recipe makes the iconic dessert achievable in your own kitchen. It looks impressive enough for celebrations but is simple enough for any baker, breaking down into easy steps. Perfect for when you crave a comforting yet elegant dessert. Let’s bake this crowd-pleasing Boston Cream Cake recipe together!
Why You’ll Love This Recipe
- Classic Combination: The trio of vanilla cake, creamy custard (pastry cream), and chocolate glaze is a timeless flavor profile that appeals to almost everyone. This Boston Cream Cake recipe honors that tradition.
- Texture Heaven: You get the softness of the sponge cake, the smooth silkiness of the pastry cream, and the rich snap of the chocolate ganache all in one bite. It’s a symphony of textures.
- Impressive Presentation: With its distinct layers and glossy chocolate topping, this cake looks sophisticated and special, perfect for birthdays or gatherings. It truly is a showstopper.
- Achievable Elegance: While it looks fancy, the steps are broken down clearly, making it less intimidating than you might think. You can successfully create this masterpiece.
- Versatile Base: You can make the cake layers from scratch following this Boston Cream Cake recipe for a traditional approach, or adapt it using a cake mix if you prefer a shortcut (see FAQs for notes on using mixes).
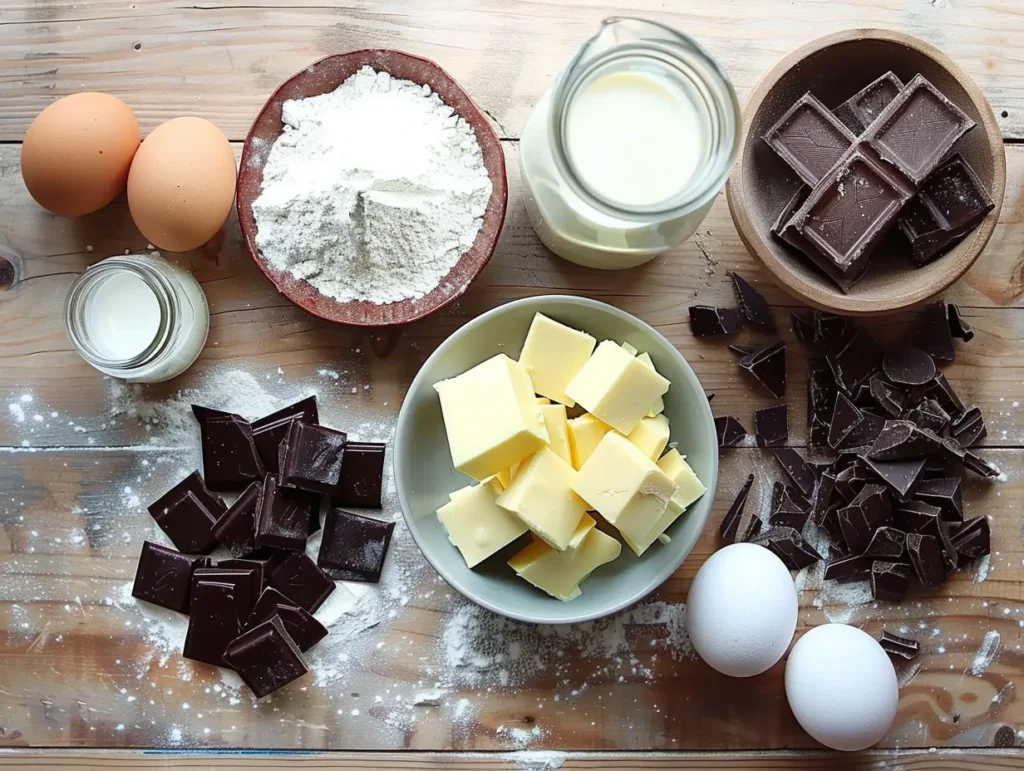
Ingredients
Make sure you have all your ingredients measured and ready before you begin. Using room temperature ingredients like eggs where specified can help ensure a better cake texture for this Boston Cream Cake recipe.
For the Vanilla Cake:
- 1 ¼ cups (140g) All-purpose flour
- 1 ¼ teaspoon Baking powder
- ½ teaspoon Salt
- ½ cup (1 stick/113g) Unsalted butter, softened
- 1 cup (200g) Granulated sugar
- 2 Large eggs, room temperature
- ½ cup (120mL) Whole milk
- 1 ½ teaspoons Vanilla extract
For the Pastry Cream (Custard Filling):
- 2 cups (480mL) Whole milk
- 6 Large egg yolks, room temperature
- ⅔ cup (133g) Granulated sugar
- ¼ cup (30g) Cornstarch
- Pinch of Salt
- 1 tablespoon (15g) Unsalted butter, cold
- 1 tablespoon (15mL) Vanilla extract
(Note: Ensure pastry cream is made ahead and chilled thoroughly for at least 2 hours, or preferably overnight)
For the Chocolate Ganache:
- 4 ounces (113g) Bittersweet or Semisweet chocolate, finely chopped (Using quality chocolate is recommended for best flavor)
- ½ cup (120mL) Heavy whipping cream
- 1 tablespoon (15g) Unsalted butter (optional, for extra shine)
Equipment:
- Two 8-inch or 9-inch round cake pans
- Mixing bowls
- Whisk
- Electric mixer (stand or hand-held)
- Medium saucepan
- Fine-mesh strainer
- Spatula
- Wire rack
- Cake leveler or serrated knife
Step-by-Step Instructions
Follow these steps carefully for the perfect Boston Cream Cake recipe. Remember that chilling times are crucial, especially for the pastry cream. Take your time and enjoy the process.
Make the Pastry Cream (Needs Chilling Time):
- Heat Milk: Pour the whole milk into a medium saucepan. Heat over medium heat until it just begins to simmer (small bubbles form around the edges). Watch carefully to prevent scorching. Remove from heat promptly.
- Prepare Yolks: In a medium bowl, whisk together the egg yolks, granulated sugar, cornstarch, and salt. Continue whisking until the mixture is smooth and pale yellow. This step incorporates air and helps dissolve the sugar.
- Temper Eggs: Gradually whisk about ½ cup of the hot milk into the egg yolk mixture. This process is called tempering. It slowly raises the temperature of the yolks, preventing them from cooking too quickly and scrambling when added back to the saucepan. Whisk constantly during this process.
- Cook Custard: Pour the tempered yolk mixture back into the saucepan containing the remaining hot milk. Return the saucepan to medium heat. Whisk constantly and vigorously. Make sure your whisk reaches the bottom and corners of the pan to prevent sticking and ensure even cooking. Bring the mixture to a boil. Once boiling, continue to cook for 1-2 minutes, whisking constantly. The mixture will become very thick, similar to the consistency of pudding. This cooking step activates the cornstarch fully.
- Finish Cream: Remove the saucepan from the heat immediately once thickened. Whisk in the cold butter until it is completely melted and incorporated. The cold butter helps stop the cooking process and adds richness and shine. Stir in the vanilla extract now for the best flavor infusion.
- Strain & Chill: Pour the finished pastry cream through a fine-mesh strainer into a clean bowl. This crucial step ensures a perfectly smooth, silky texture by removing any potential small lumps or bits of cooked egg. Cover the surface of the cream directly with plastic wrap, pressing it down gently. This prevents a skin from forming as it cools. Refrigerate the pastry cream for at least 2 hours, but preferably 4 hours or even overnight, until it is completely cold and firmly set. Proper chilling is essential for the structure of the finished Boston Cream Cake recipe.
Make the Vanilla Cake Layers:
- Preheat & Prep: Preheat your oven to 350°F (175°C). Prepare two 8-inch or 9-inch round cake pans. Grease the bottom and sides thoroughly with butter or cooking spray. Flour the pans, tapping out any excess. For guaranteed easy removal, line the bottoms with circles of parchment paper.
- Combine Dry Ingredients: In a large bowl, whisk together the all-purpose flour, baking powder, and salt. Whisking helps aerate the flour and distribute the leavening agent and salt evenly.
- Cream Butter & Sugar: In the bowl of your stand mixer fitted with the paddle attachment (or using a hand mixer and a large bowl), beat the softened unsalted butter and granulated sugar together. Start on medium speed and gradually increase to medium-high. Beat for about 3-4 minutes, scraping down the sides of the bowl occasionally, until the mixture is significantly lighter in color and appears fluffy. This step incorporates air, which contributes to a tender cake.
- Add Eggs & Vanilla: Add the room temperature eggs one at a time, beating well for about 30 seconds after each addition until fully incorporated. Scrape down the sides and bottom of the bowl as needed to ensure everything is mixed evenly. Beat in the vanilla extract until combined.
- Alternate Wet & Dry: Reduce the mixer speed to low. Add the flour mixture (from step 2) in three additions, alternating with the milk in two additions. Begin and end with the dry ingredients (Flour -> Milk -> Flour -> Milk -> Flour). Mix only until each addition is just combined. Be careful not to overmix at this stage; stop mixing as soon as the streaks of flour disappear. Overmixing can result in a tough cake.
- Bake: Divide the finished cake batter evenly between the two prepared cake pans. Use a spatula to smooth the tops of the batter for even baking. Bake in the preheated oven for 25-35 minutes. Baking times vary: check 8-inch pans around the 25-30 minute mark, and 9-inch pans around 23-28 minutes. Cakes made from scratch might take slightly longer, potentially up to 35-40 minutes. The cakes are done when a wooden skewer or toothpick inserted into the center comes out clean or with just a few moist crumbs attached. The tops should spring back lightly when touched.
- Cool: Once baked, remove the cake pans from the oven and place them on a wire rack. Let the cakes cool in their pans for 10-15 minutes. This allows them to set slightly. Then, carefully invert the cakes out of the pans onto the wire rack. Peel off the parchment paper if used. Allow the cakes to cool completely to room temperature before proceeding with assembly. This can take 1-2 hours.
Make the Chocolate Ganache:
- Heat Cream: Place the finely chopped bittersweet or semisweet chocolate into a medium heatproof bowl. Finely chopping ensures the chocolate melts evenly. Pour the heavy cream into a small saucepan. Heat the cream over medium heat (or carefully in the microwave in short bursts) until it just begins to simmer around the edges. Do not let it come to a rolling boil.
- Combine: Pour the hot heavy cream directly over the chopped chocolate in the bowl. Let the mixture sit undisturbed for 5 minutes. This allows the heat from the cream to gently soften and melt the chocolate.
- Whisk Smooth: After 5 minutes, gently begin whisking the mixture. Start whisking from the center of the bowl and work your way outwards in small circles. Continue whisking until the ganache comes together into a smooth, glossy, and fully combined emulsion. If you are adding the optional tablespoon of unsalted butter for extra shine and richness, whisk it in now until it is completely melted and incorporated.
- Cool Slightly: Let the finished ganache cool at room temperature for about 10-15 minutes, or until it has thickened slightly but remains pourable. It should coat the back of a spoon. If it cools too much and becomes too thick to pour, you can gently reheat it over a double boiler or in the microwave for 5-10 seconds at a time, stirring well, until it reaches the desired consistency.
Assemble the Boston Cream Cake:
- Level Cakes (Optional but Recommended): For a professional look and stable cake, check if your cooled cake layers have domed tops. If they do, use a long serrated knife or a cake leveler to carefully slice off the domes, creating flat, even surfaces. This makes layering easier and prevents the top layer from sliding.
- Place Bottom Layer: Select one cake layer and place it onto your serving plate, cake stand, or platter. If you leveled the cakes, place it cut-side up.
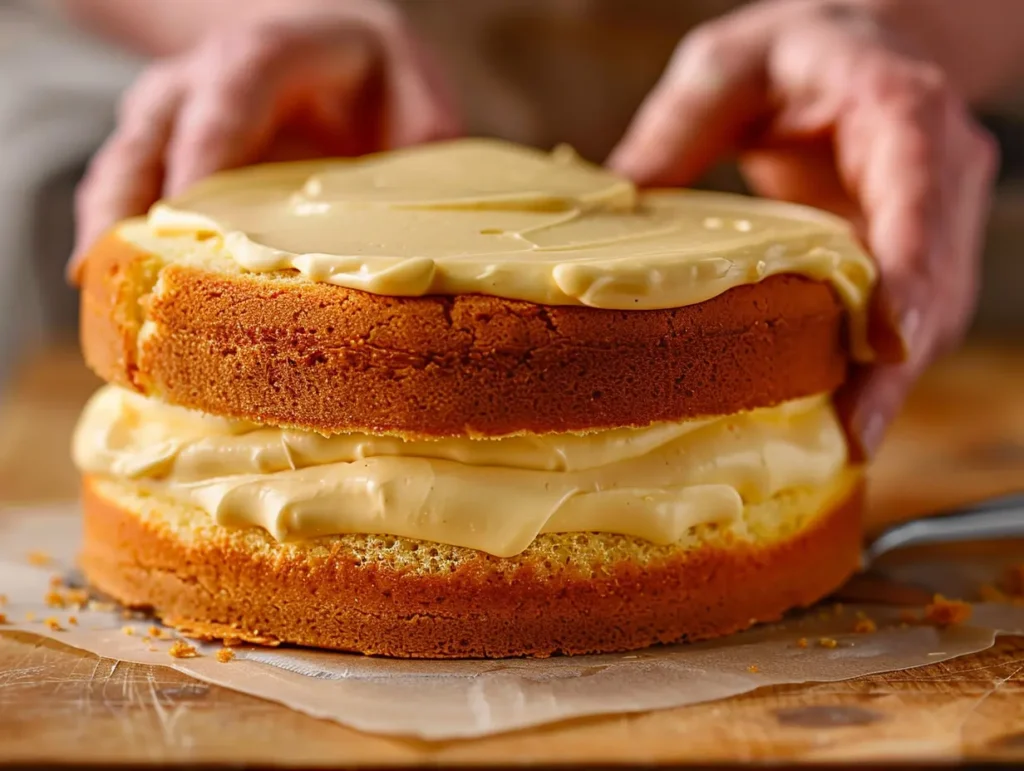
- Add Pastry Cream: Retrieve the thoroughly chilled pastry cream from the refrigerator. It will be quite thick. Give it a vigorous whisk to loosen it up and make it smooth and spreadable again. Spoon the pastry cream onto the center of the bottom cake layer. Using an offset spatula or the back of a spoon, spread the pastry cream evenly over the cake layer, leaving about a ½-inch border around the edge. This prevents the cream from squeezing out too much when the top layer is added.
- Add Top Layer: Carefully lift the second cake layer and place it on top of the pastry cream. Position it so the bottom side (the side that was against the pan) is facing up. This usually provides the flattest, smoothest surface for the ganache. Gently press down slightly to adhere it to the cream filling.
- Pour Ganache: Take the slightly cooled chocolate ganache. Slowly pour it over the center of the top cake layer. Allow it to flow outwards. Use an offset spatula or the back of a spoon to gently guide and spread the ganache towards the edges of the cake. Encourage it to drip down the sides naturally for that classic Boston Cream Cake recipe look. Work relatively quickly as the ganache will begin to set as it cools.
- Chill: Carefully transfer the assembled Boston Cream Cake to the refrigerator. Chill for at least 1 hour, or longer (2-3 hours is ideal), before slicing and serving. This allows the ganache to set completely and helps the flavors meld together beautifully. Serve the cake chilled directly from the refrigerator, or let it sit at room temperature for about 20-30 minutes before serving for a slightly softer texture if preferred.
Serving Suggestions
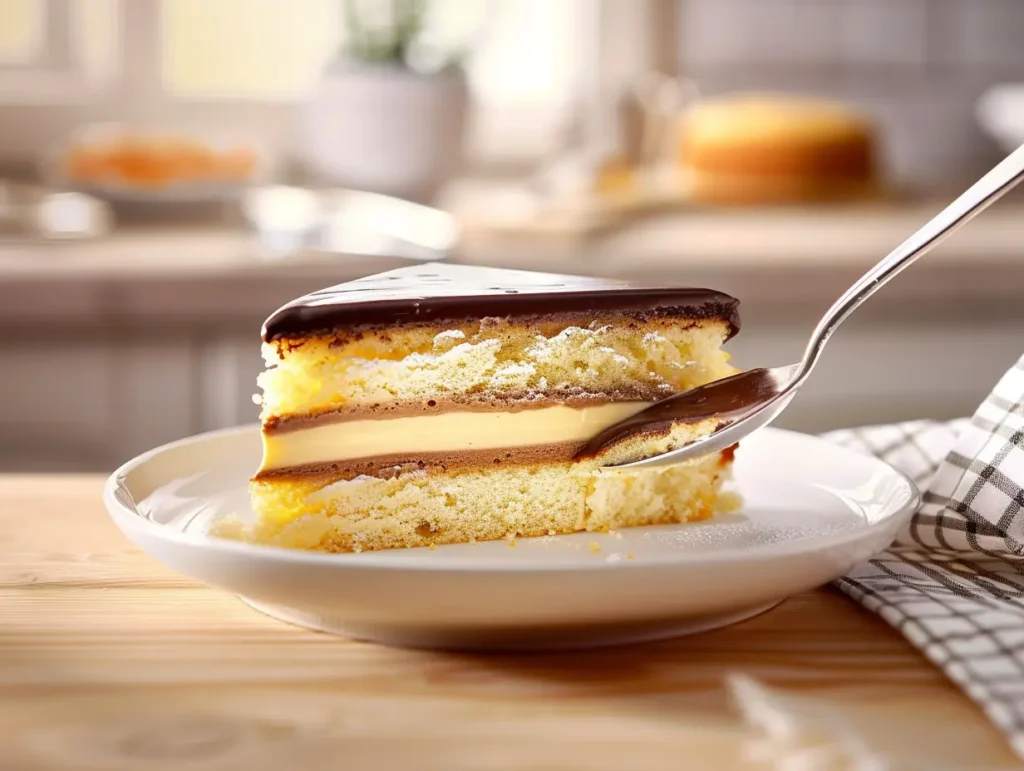
- Classic Slice: The best way to serve this Boston Cream Cake recipe is in generous wedges on dessert plates. For clean slices, dip a sharp knife in hot water and wipe it dry between each cut.
- Beverage Pairing: This cake’s combination of vanilla, cream, and chocolate pairs beautifully with simple beverages. A hot cup of freshly brewed coffee or tea is classic. A cold glass of milk is also a wonderful accompaniment, especially for kids.
- Fresh Berries: Add a pop of color and a touch of tartness by serving each slice with a side of fresh berries. Raspberries, sliced strawberries, or even blueberries complement the rich flavors well.
- Occasions: This impressive-looking dessert is perfect for celebrating. Serve this Boston Cream Cake recipe for birthdays, holidays like Easter or Mother’s Day, dinner parties, potlucks, or any time you want to share a special homemade treat.
FAQs
- Why is it called Boston Cream Pie if it’s a cake?
This common question relates to history! The name originates from the mid-19th century Parker House Hotel in Boston. Back then, the terms “cake” and “pie” and the pans used for them were often interchangeable. The dessert was originally named “Parker House Chocolate Cream Pie” and the name, particularly “Boston Cream Pie,” stuck even though its structure is clearly a cake. - Can I make this Boston Cream Cake recipe ahead of time?
Yes, parts of this recipe are ideal for making ahead. The pastry cream must be made ahead – ideally the day before, but at least 4 hours ahead – so it can chill completely. The cake layers can also be baked one day in advance. Once completely cooled, wrap them tightly in plastic wrap and store them at room temperature. Assemble the cake with the chilled pastry cream and ganache on the day you plan to serve it for the best texture, or up to one day ahead if needed (keep refrigerated). - How do I store leftovers?
Due to the dairy-based pastry cream filling, leftover Boston Cream Cake must be stored in the refrigerator. Cover it well with plastic wrap or store it in an airtight cake container to prevent it from drying out or absorbing fridge odors. It’s best enjoyed within 2-3 days of assembly. - Can I use a cake mix for this recipe?
Absolutely. If you’re short on time or prefer the convenience, you can substitute a standard yellow or vanilla cake mix for the scratch cake layers. Prepare the cake mix according to package directions for two 8-inch or 9-inch round layers. Let them cool completely before proceeding with the assembly using the homemade pastry cream and ganache from this Boston Cream Cake recipe. Some bakers like to “doctor” cake mixes by adding an extra egg, using milk instead of water, or adding a teaspoon of vanilla for richer flavor. - My pastry cream is lumpy, what did I do wrong?
Lumps usually happen if the milk was too hot when tempering the eggs (causing scrambling), if the mixture wasn’t whisked constantly while cooking, or if it slightly scorched on the bottom. Straining the pastry cream after cooking, as directed in the recipe, is the best way to fix minor lumps and ensure a smooth finish. - Can I freeze Boston Cream Cake?
Freezing the assembled cake is generally not recommended. The pastry cream can weep or become watery upon thawing, altering the texture negatively. The ganache may also lose its gloss or crack. It’s best enjoyed fresh or within a few days from the refrigerator. You can freeze the unfrosted cake layers successfully. Wrap them tightly in plastic wrap and then foil, and freeze for up to 2 months. Thaw overnight in the refrigerator before assembling with freshly made pastry cream and ganache.
Nutrition Facts (Approximate)
Please note: Nutrition information is provided as an estimate only, based on standard ingredients and an assumed serving size (typically 1/10th or 1/12th of the cake). Actual values can vary significantly based on the specific brands of ingredients used, precise measurements, final cake size, and the size of the slice cut.
- Serving Size: 1 slice (approx. 1/10th of cake)
- Calories: 450 – 550 kcal
- Total Fat: 25g – 35g
- Saturated Fat: 12g – 18g
- Total Carbohydrates: 50g – 65g
- Sugars: 35g – 45g
- Protein: 5g – 8g
- Sodium: 250mg – 350mg
(This estimation uses common values found in similar Boston Cream Cake recipes analyzed by nutritional calculators. Consult specific ingredient labels or use an online calculator with your exact ingredients for more precise information if needed.)
Recipe Tips for Success
- Chill Pastry Cream Thoroughly: We can’t stress this enough for the Boston Cream Cake recipe. Warm or even cool (but not cold) pastry cream will be too soft, making assembly difficult and potentially causing the layers to slide. It needs to be fully set and cold. Plan ahead!
- Don’t Overmix Cake Batter: Once you start alternating wet and dry ingredients, mix only until just combined. Overmixing develops the gluten in the flour, leading to a denser, tougher cake crumb instead of a light and tender one.
- Cool Cakes Completely: Patience is key. Assembling the cake with even slightly warm layers will melt the pastry cream and the ganache, resulting in a messy outcome. Ensure layers are at room temperature or even slightly chilled.
- Strain the Pastry Cream: This simple step elevates your pastry cream from potentially good to perfectly silky smooth. It catches any tiny imperfections. Don’t skip it.
- Temper Eggs Carefully: Add the hot milk to the egg yolk mixture slowly and gradually while whisking constantly. This gently heats the yolks. Adding hot milk too quickly will cook the eggs, resulting in scrambled egg bits in your cream.
- Ganache Consistency is Key: The temperature of the ganache when pouring is important. Too hot, and it will be thin and run off the cake. Too cool, and it will be thick, clumpy, and hard to spread smoothly. Aim for a consistency like slightly thickened honey – pourable but with body. Gently reheat if it thickens too much.
- Room Temperature Ingredients (for Cake): Using room temperature butter, eggs, and milk for the cake batter helps them emulsify better, creating a more uniform texture and better volume.
- Level Your Cakes: Taking a minute to level the cake layers creates a flat, stable surface for the filling and top layer. This prevents wobbling and makes the final cake look much more professional.
Conclusion
This Boston Cream Cake recipe offers a delightful journey into classic American baking, yielding a dessert that is both comforting and elegant. The combination of soft vanilla sponge, cool and creamy pastry filling, and rich chocolate topping is truly hard to beat1. While it requires several steps – making the cream, baking the cake, preparing the ganache, and assembly – each part is manageable, and the final result is incredibly rewarding.
Remember the key tips: chill the pastry cream completely (a crucial step for structure2), don’t overmix the batter, and allow components to cool properly before assembly. Taking your time ensures success with this Boston Cream Cake recipe.
For the best flavor, consider using high-quality ingredients, especially pure vanilla extract and good chocolate for the ganache, as their flavors shine through. While this recipe details the classic layered cake, many fun variations exist. For instance, you could simplify the process using a doctored cake mix and a quick pudding-based filling3, or try different formats like an impressive Boston Cream Bundt Cake7 or an easy-to-serve Boston Cream Poke Cake10. Exploring these different approaches can adapt this classic dessert to various occasions and skill levels. We hope you thoroughly enjoy the process of baking and, more importantly, sharing and savoring every delicious slice of your homemade Boston Cream Cake!